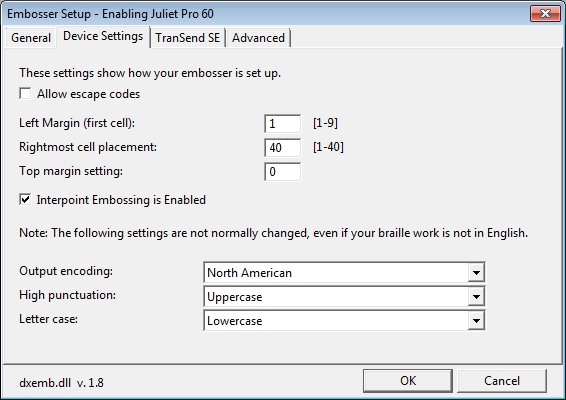
When you select Device Settings tab, the dialog may not appear as shown in the example below. There is a simple explanation for this:- what appears is entirely dependent on which Brailler Device you have selected in the General tab.
For many modern embossers, little or nothing appears in this panel. This simply means that DBT does not need additional information to drive your embosser correctly.
In the example shown below, we have an Enabling Juliet Pro 60 with the “Left Margin (first cell):” set at 1, the "Rightmost cell placement:" set at 40 and the "Top margin setting:" set at 0. These are the factory default settings for the embosser that will produce a 40 character line.
Allow escape codes - checking the "Allow escape codes" check box allows you to temporarily override some of your embosser settings using the settings from Document: Embosser Setup (Ctrl-F11).
Interpoint Embossing is Enabled - checking the "Interpoint Embossing is Enabled" check box tells DBT that you are using an interpoint embosser. This checkbox enables special pagination control for interpoint embossers.

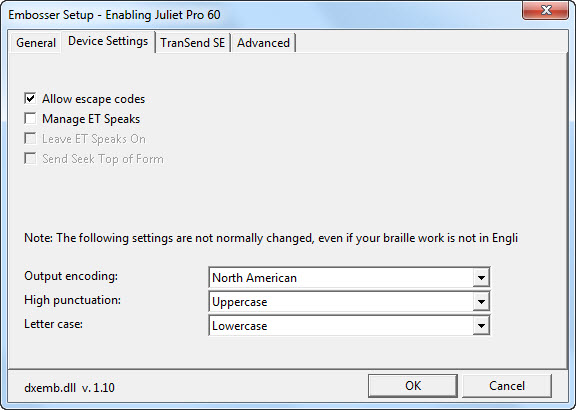
In the following example shown below, we have the same Enabling Juliet Pro 60, which is set up to “Allow escape codes” and has speech.
Allow escape codes - checking the "Allow escape codes" check box allows you to temporarily override some of your embosser settings using the settings from Document: Embosser Setup (Ctrl-F11).
Manage ET Speaks - checking the "Manage ET Speaks" check box allows you to silence the speaking of escape sequences.
Leave ET Speaks On - checking the "Leave ET Speaks On" check box allows you to force speech at the end of a document.
Send Seek Top of Form - checking the "Send Seek Top of Form" check box allows DBT to send an automatic top of form control to supported embossers.

The remaining three List Boxes, "Output encoding", High punctuation" and "Letter case" should only be changed in very exceptional circumstances.