File: Emboss
Keystroke: ⌘ + E

The Emboss function submits your document to produce braille on your braille embosser.
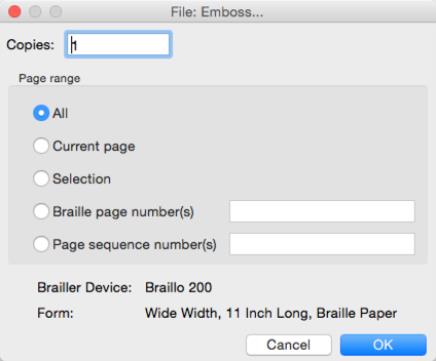
There are two basic options to set on the Emboss dialog: the number of copies and the range of pages to be embossed. The dialog also displays your currently selected embosser and form size.
Copies: is a text field where you enter the number of copies to emboss. The default is 1.
Page Range: is a set of radio button options, some with text-entry fields to enter page numbers.
- All: The entire braille document will be embossed.
- Current page: The single page your cursor is located in will be embossed.
- Selection: If you highlight a section of the braille document, only that section will be embossed.
- Braille page number(s): Specify pages by typing one or more page numbers as they appear on the pages of your document. You may specify a range of pages by using a hyphen. You may also specify non-continuous pages (or ranges of pages) by using a comma.
- Page sequence numbers(s): Only the pages you specify will be printed, but you must specify those pages as if your document starts at page 1 and continues with page 2, 3, etc. In other words, you may have to ignore the page numbers displayed on each page and count pages in the document, or look at the status line for the sequence number of each page. For example, your document might have pages numbered 1, 2, A1 and A2. Pages A1 and A2 would be pages 3 and 4 in the sequence.
If you select either Braille Page Numbers or Page Sequence Numbers, then you must enter a page range. Leaving the text field blank will emboss all your pages.
If you wish to emboss a range, you may enter a beginning and ending page separated with an unspaced hyphen, e.g. 4-7. To emboss two or more non-contiguous pages, separate the page numbers with a comma, e.g. 8,12. If you wish to include a blank page for any reason, use the letter b. You can "mix" as required, e.g. 4-7,8,b,12.
Press OK to have your selected pages sent to the embosser, or press Cancel to close the dialog with no action taken.
Embossing Notes
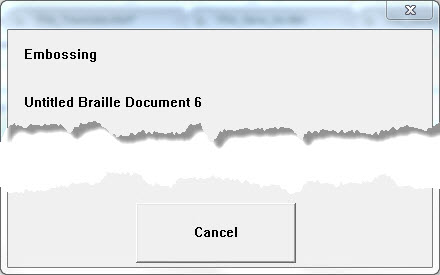
Once embossing has begun a message box appears to show your progress. If you wish to abort, you can either press Esc or click on the Cancel button. If you wish to pause embossing, press the on-line/off-line button on your embosser. (Embossers vary; see your manual for details.)
Because many embossers take advantage of spooling the file data before they begin, there may be a delay before the embosser stops. DBT has no control over this.

More on Page Sequence Numbers: When you emboss, you can choose the start and end page using "Page Sequence Numbers". This does NOT mean using the number printed in braille on the page but rather the number you get by counting the first, second, third, fourth, etc., pages in the document. For example, let us say your first four pages have Roman numerals i - iv, and then your document continues with three pages of Arabic numbers, 1 - 3. That is seven pages. To print only those first two pages containing Arabic numbers, you would specify Page Sequence Numbers from page 5 to page 6.
Note also that the page number, line number, and column number where the cursor sits are displayed in the Status Line. So, if you know that the pages you want to emboss appear with page numbers in braille which are different from their physical order in the file, then this is a clear means to determine the Page Sequence range to emboss.
Double Sided or Interpoint Embossers: Because the two sides of any embossed sheet normally place the odd numbered page on the front side and the even numbered page on the back, users of interpoint embossers who are embossing a defined range of pages are advised to take account of that, which usually means beginning the page range to emboss with and odd number and finishing on an even number. Whatever the numbering in your particular circumstances, be sure to account for the desired front/back relationship of your pages on the embossed sheets.
See Also: Global: Embosser Setup.