Simple Installation
Chances are that you can install your Duxbury program without these instructions. Installation only requires invoking the installer package (.msi file) and following its prompts.
Most people now acquire DBT by downloading it. Once you download, merely double-click on the installer package to run it. Or, if you took delivery by CD, you can insert the CD into your computer and normally it will invoke the installer package automatically. (If for any reason it does not, browse for the .msi file and double-click on that.)
It is now very common on Windows systems that you must pass through a Security Warning at the outset of installation and a User Account Control (UAC) dialog prior to the end. UAC requires that you have administrative level privileges on your computer, and you may have to enter your password.
Step 1: Launch the Installer
To begin, the installer displays a welcome screen that identifies your program and version. You should see a screen like the following:
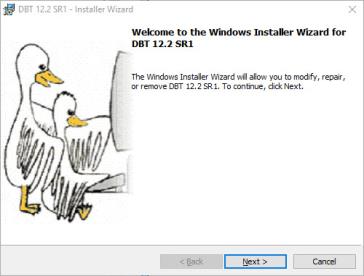
Click the Next button, or type Alt+N or Enter, to continue.
If you wish to halt installation at any time, click the Cancel button, or press the Esc (escape) key. The installer will skip to a screen that says, "Completed", but your computer system will remain unchanged unless you follow installation through to the end.
CD Installation: If simply inserting the CD does not cause the Installer to appear, then browse the CD contents for a file called dbt-1207.msi and open it, then proceed as above.
Step 2: Read the License Agreement
Next your End User License Agreement appears.
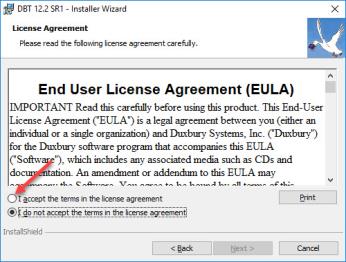
The Next button is initially disabled. In order to continue, you must accept the terms of the license agreement by selecting the radio button so labeled, or by typing Alt+A. If this is your first time installing 12.7, we urge you to read the text first. If you choose not to accept the agreement, you may cancel installation and contact your dealer or Duxbury Systems to return the software within 90 days of your purchase.
If you accept the license agreement, simply click Next, or type Alt+N or press Enter, to continue.
Step 3: Identify your Installation
On the next screen you provide the information to activate your DBT: your User Name, Organization (optional), and License Text.
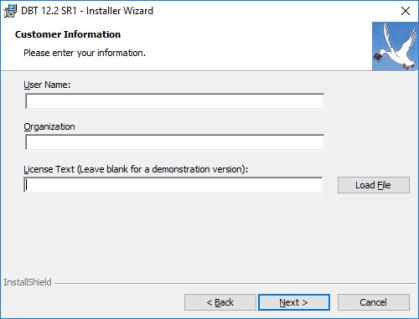
Some of these fields may be already filled in for you. Your User Name is usually the same as your login name. (For simplicity and ease of communication with Duxbury, especially when a number of DBTs are in use in a single organization, we suggest you leave this as your login name.) For the Organization field, your organization may provide guidance, or fill it in as you think best.
You can move from field to field using the cursor or the Tab key.
The License Text is the critical field in this dialog. If you are updating from an earlier installation, your License Text is usually displayed. If this is a new installation, then you should find your License Text and enter it exactly as it was provided to you, paying attention to spaces and capital letters.
The pattern of a License Text usually looks like this:
DBT H1234-12345678
Older licenses had this pattern:
Single-user license G1234-12345678
If you have any difficulty locating your License Text, please contact your dealer or Duxbury Systems.
Note: Load File Button - You should ignore this button unless directed to use it by Duxbury Support. (Load File is an obsolete option still in use in only a few DBT customer locations.) If you click it by accident, hit Cancel and return to this screen.
You may leave the License Text field blank if you are installing a demonstration version of DBT. You'll be given the chance to supply it later, if you purchase a license.
When done, click Next , or press Alt+N or Enter, to continue.
Step 4: Select a Typical Setup
This screen appears with the Typical installation already selected. You do not need to change anything on this screen.
: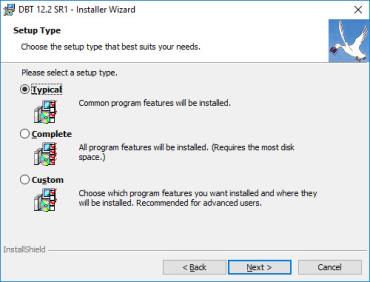
The other options in this dialog initiate a Custom Installation. We do not recommend that for most users. Click Next (Enter, or Alt+N) to continue.
Step 5: Confirm your Work
The next screen summarizes what you have chosen:
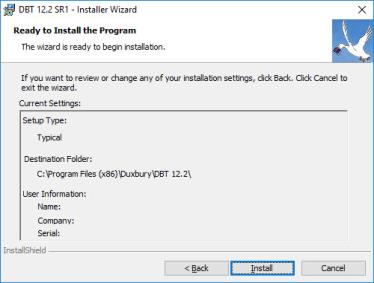
This screen is your chance to review your installation settings. If you want to make any changes, click the Back button (or type Alt+B) to return to the previous screen. You can continue back as far as you need to. Once you have made your corrections, use Next (or Alt+N) until you have returned to this screen.
To continue, just click the Install button (or use Alt+I or Enter) to let the installer go about its work. You will see a screen with a progress indicator.
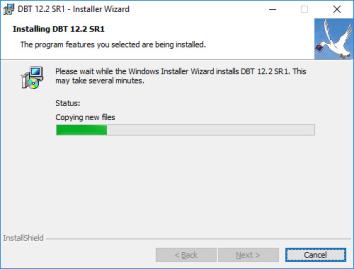
Even now, you can cancel the installation, though this will take longer than it would have before, because canceling now requires the installer to do some automatic clean-up tasks in order to leave your computer unmodified.
The status bar will reset itself several times and progress again from the left to the right. This is normal for a Windows program installation.
Step 6: Finish
When the installer has finished, you see the "Installer Completed" screen.
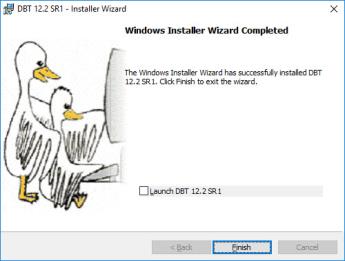
On this screen, only clicking Finish is required, but if you check the "Launch 12.7" checkbox first, the Installer starts DBT for you. Not only does this allow you to confirm that DBT is working, but it also allows you to activate DBT (under most circumstances), as well as to install and configure embossers.
Note: If you are not the end user, and the end user does not have administrative rights on this machine, then you should perform these tasks before turning the computer over to the end user.