 Word - Quick Start for all users.
 Word - Quick Start for all users.
Word is undoubtedly one of the most commonly used programs for producing almost any form of text document. However, it is also a program where improper use, can result in much time being wasted.
Sadly, the vast majority of users have never been formally taught even the basics of Word for Word for Windows
To fully understand this topic, we need to appreciate the general structure of documents. But let us begin very simply.
Aside from general text, there is generally a main Heading or Title in larger text, and often sub-Headings.
To change the appearance, many users will simply highlight what they wish to appear as a Heading or Title, and make changes manually, which might only take a few seconds. But if you have many such changes to make, the time can mount up, and often mistakes can be made.
But Word has what are called "Styles". The illustration below shows an example of how these appear in what Word calls its "Style Gallery".

To apply a Style, all you have to do, is highlight the text you wish to change, and click on the Style you wish to use. You can also use keystrokes such as Alt+Ctrl+1 to apply Heading 1.
Please do not be put off here. You can very easily change the appearance of any of Word's Styles.
A bonus here is that once you have changed a Style to your liking, it will be applied to all instances within your document, as well as any further application of that Style.
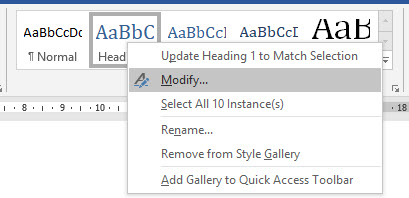
Simply right click on the Style you wish to change, and select "Modify" as shown below.

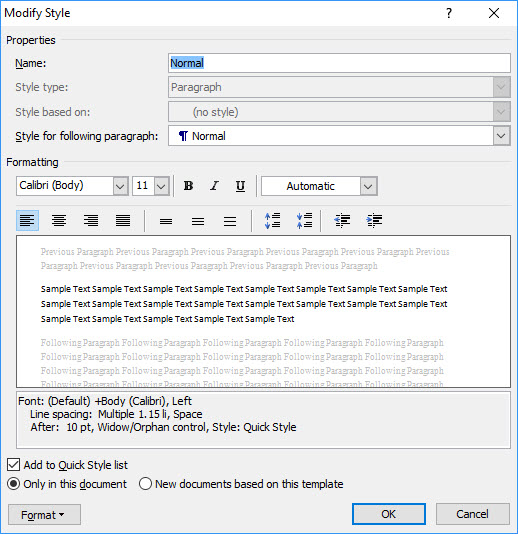
The following dialog will appear. This is not as intimidating as it may first appear.

If you are new to this process, we suggest you begin by just changing the fields in the "Formatting" section for now.
We also advise leaving the "Only in this document" radio button checked. We will explain why later.
This is a one of change which you make via Word's Options.
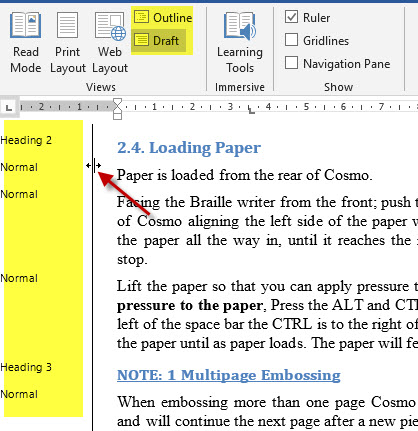
The result, is that if you "View" your document in Draft or Outline, you will see a column added to the left of your document as shown below. (Note that you can change the width of this column at any time on screen by using the mouse to drag if left or right.)

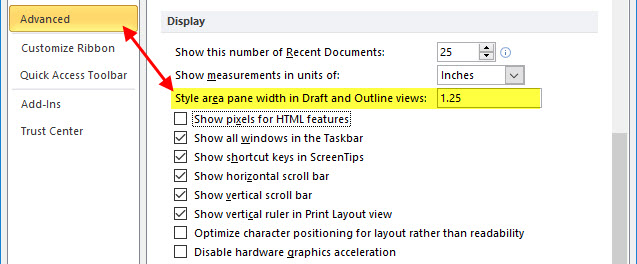
To set this up initially, go to Word's Options and select "Advanced". Scroll down to the "Display" section, and enter a valid number (be in inches or millimeters) in "Style area pane width in Draft and Outline views:"
