Global: Embosser Setup: Device Settings
The Device Settings tab is usually the second step in embosser setup. What appears in this tab is entirely dependent on which Embosser Model you selected in
Fortunately, with many modern embossers little needs to be done in this panel, and
To provide a better picture of the great variety of braille embossers available, this topic presents two examples. In one example the images come from a Windows installation. In the other example the images are from a Macintosh. You can ignore the differences in dialog style; what matters is how the settings required are particular to the device selected.
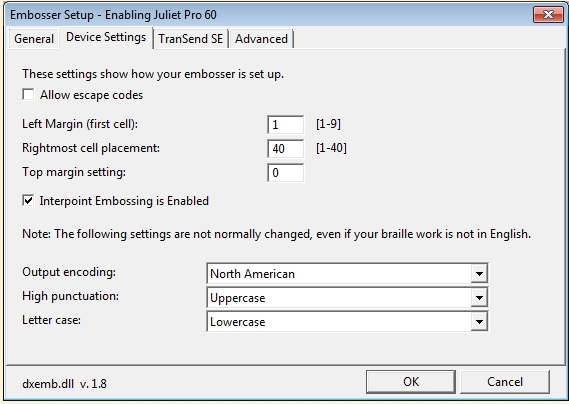
Example 1: A Juliet Pro 60
In this example, we have an Enabling Juliet Pro 60 with the Left Margin (First Cell) set at 1, the Rightmost Cell Placement set at 40 and the Top Margin Setting set at 0. These are the factory default settings for the embosser, and they produce a 40 character line.
Allow escape codes: Checking the "Allow escape codes" check box allows you to temporarily override some of your embosser settings using the settings from Document: Embosser Setup (Ctrl+F11). (It also changes the other options presented on this tab, which is explained further on.)
Interpoint Embossing is Enabled: Checking "Interpoint Embossing is Enabled" indicates that you are using an interpoint embosser (and want double-sided embossing). It also enables special pagination control for interpoint embossers.
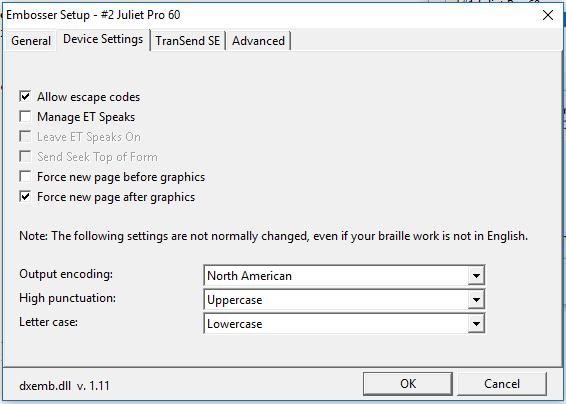
Continuing the example, we have the same Enabling Juliet Pro 60, but it is now set to “Allow escape codes”. This causes an additional set of check boxes to appear in place of the margin settings.
Manage ET Speaks: This check box allows or silences the speaking of escape sequences.
Leave ET Speaks On: Checking "Leave ET Speaks On" forces speech at the end of a document.
Send Seek Top of Form: This check box allows
Force new page before graphics and Force new page after graphics: These check boxes help you control embosser behavior with respect to tactile graphics that may appear on the page.
Regarding the last three controls, see the note at the end of this topic.
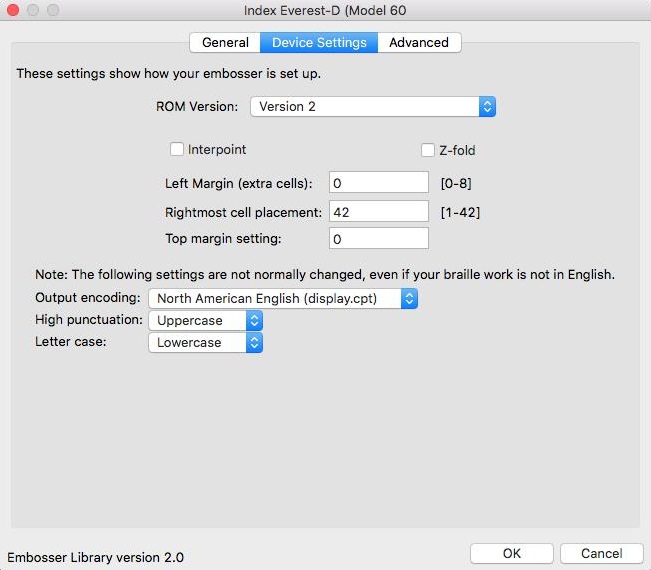
Example 2: An Index Everest-D
In the second example, the user had selected an Index Everest-D in the General tab. You will see both similarities and differences compared with our first example.
Index embossers behave quite differently one from another depending on what ROM Version is installed. ("ROM" means "Read-Only Memory", which holds the on-board firmware that controls the embosser mechanisms.)
As illustrated below, when the ROM version (firmware) is unspecified or version 2, the user is offered controls to set Interpoint on/off, Z-fold (paper feed) on/off, and the page Margins.
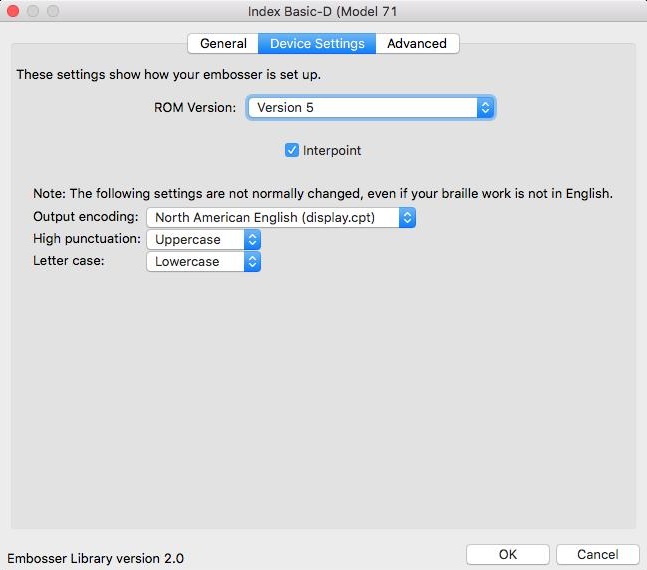
However, if the Index embosser has a later ROM version installed, such as version 4 or 5, the only user setting required is whether or not to do Interpoint. (Brailling in interpoint means embossing both sides of the paper).
The Last 3 Fields: As noted directly in the dialogs in both examples, the last three list boxes: "Output encoding", "High punctuation" and "Letter case" are normally left as they were initially set. These controls should only be changed in very exceptional circumstances and with proper guidance from your embosser manufacturer or your dealer.
Only in rare circumstances, will proper embosser setup require using the Advanced tab.