Creating and Saving a New Template
Starting from the Duxbury-supplied templates, you can create a custom template to retain your personal or corporate preferences for page formatting, translation options, and especially to create styles that meet your particular needs.
In addition, your customized templates can contain blocks of text that you want included as standard text in all the documents that use this template. An example might be a required set of transcriber notes.
To make a custom template, you begin by creating a new document (with File: New) and selecting the template that most closely matches your needs. If your language has only one supplied template, that template is your likely starting point. If your language has several templates available, again, select the one that provides the best match.
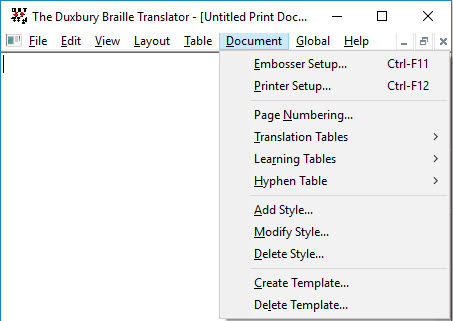
You should now have a blank document on your screen. You will do most of your work from the Document menu.

Beginning with some basic settings, please note that in your newly open document, you absolutely must make any changes to your Printer or Embosser settings from your Document menu, using Document: Printer Setup and Document: Embosser Setup. Changes you make in the Global menu will have no effect for this purpose.
If you selected a template which uses one base language, but your custom template requires a different base language, we suggest you make this change next. See the Document: Translation Tables menu to make your selection.
Note that there may be special considerations for languages depending on their context. For example, although you might wish to produce a document in Spanish or French, you must decide if you wish to present those languages as taught in an English School or as used in the native country. There is a difference in the braille rules to be applied.
With the settings for your embosser, printer, and translation tables done, now might be a good time do an initial save of your template, especially if you wish to keep it as a "master template" that you can use as a basis to create other variations. (If so, you may wish to name it accordingly.)
Creating a custom template usually includes defining new styles, which you can do now in your empty document. The Document Menu has controls to allow you to Add Styles, Modify Styles, and Delete Styles. (For an example of creating a custom style, see the topic, "Create Style, Example 3: Numbering".)
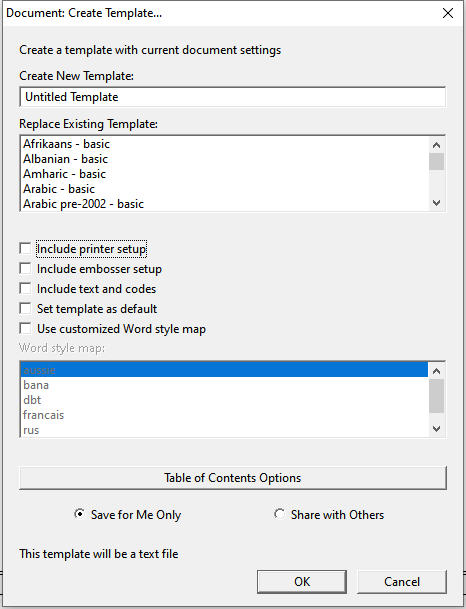
Your custom template can also include selecting a custom Word Style Map file and setting up new Table of Contents formatting. These are selected in the Create Template dialog.
From the Document menu, select Create Template. The following dialog will appear.

The elements and details of using this dialog are well presented in the topic, Document: Create Template.
Where Are My Templates Saved?
As a rule, you cannot modify the templates supplied with DBT. However, you can save a standard DBT template to a custom version, and you can even use the original template name. Because the custom template is written to a separate folder, the original DBT template will not be changed. Then, because the custom folder is checked first when the list of DBT templates is created for display, the custom version of a template is used when the custom file and the standard template have the same name.
There can be good reasons to re-use the original template name when you make a custom version of a template. (One example occurs when DBT is working with the Duxbury NimPro program.) At other times, though, you may find that using a distinct name is preferable.
A custom template for your own use is normally saved in your own computer profile:
C:\Users\[your-user-name]\AppData\Roaming\Duxbury\DBT\Templates.
A custom template for all users of your PC, is normally saved in:
C:\ProgramData\Duxbury\DBT\Templates.
Note: Drive "C:" is the normal files location on Windows, though your system may use a different "volume" for your files.
Finally, if you decide that you no longer need one of your custom templates, you can remove it using Delete Template.